Product Design 2
Thursday, 9 December 2010
ProDesktop
This lego brick was made in ProDesktop which could be a good starter task for Key Stage 3 students, which could take between 10 minutes to half an hour for students. To give tasks to different range of ability, a hardetr brick shape could be given to Gifted and Talented students, with more features.
This is the album feature of ProDesktop. here, you can add materials (In this case 'Plastic, polished') and edit colours and backgrounds. This is a great tool for younger pupils and is often used in Year 7-8 lessons, so that when a pupil creates a product, they can add materials to make it more lifelike; or if they prefer with patterns on such as polka-dot or cloud.
This is the album feature of ProDesktop. here, you can add materials (In this case 'Plastic, polished') and edit colours and backgrounds. This is a great tool for younger pupils and is often used in Year 7-8 lessons, so that when a pupil creates a product, they can add materials to make it more lifelike; or if they prefer with patterns on such as polka-dot or cloud.
SpeedStep
 This is a basic outline sketch of my waistcoat design drawn in SpeedStep. This was based on a Shirt taken from the Object bank, with sections removed and lines/curves added to create the necessary shape.
This was sublimation printed onto fabric to create a product. SpeedStep is the perfect package for young students to create patterns to make a simple Textile product. Sublimation Printing is an effective method and quick and easy. It is possible for many students to print a pattern or two in a lesson without too many time worries.
Wednesday, 8 December 2010
Google Sketchup
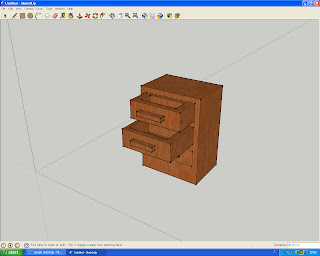
 This chest of drawers was drawn in Google Sketchup. I was experimenting with the Pull tool on the programme to create the drawers, and used the Paint tool (much like the Album section of ProDesktop) to give it a wood effect. This would be easy for young pupils to create as a starter task, and easier objects could be given to pupils who struggle, as well as harder objects for those who find it simple.
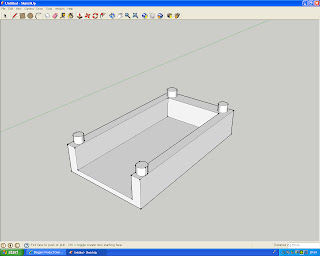
 This was my model of a tray used in a stackable Recycling Box in Student Accomodation. This software is very easy to use, adn easy to get to grips with. I find this package much easier and quicker to use than ProDesktop, although specifics are harder to achieve. For example, a lid couldn't be added on top of this, and curved edges are difficult to get on the product. Specific dimensions cannot be gained using this software, but as an effective quick-to-make rough model, this software is perfect. This would be great for Year 9's to quickly show how thier design idea would actually work, and in GCSE folders, rather than a rough drawing in their design folder.
Tuesday, 7 December 2010
2D Design
This was used for the Perfume Packaging project in Year 1 of the course. This was cut out on card using the laser cutter, and looked effective once made, as red card was placed behind the dots to add a multi-layer effect.
2D Design was the perfect software for the manufacture of this, as it was a simple job and allows the whole net to be cut out perfectly, and the package is so simple, that it only takes a short time to create something in the programme.
 This is a 2D Design sketch of a Sony Ericsson Elm mobile phone. I decided to draw this as i own this phone, and i found the shape of it particulaly interesting, as the back is shaped better to suit the human hand, and therefore feels more comfortable when holding it up to your ear to make phone calls. I based this on a simple orthographic cuboid and added curves and details to get my desired shapes, using the 'Path' tool.
 This was my mould design for pewter casting. This was later CNC Milled into MDF. This would be a good lesson to teach to Year 9's, as CAD/CAM can be taught in a more practical manner, and CAM can be fully introduced. This lesson would teach how to design a product, such as a keyring pewter part, but also how these parts can be designed and amde. It also gets pupils used to some more of the tools available in 2D Design, as it involves contouring and many shape tools on the left toolbar. This task would also show them why contouring needs to used to allow for the drill bit.
Subscribe to:
Comments (Atom)


